Outlook CalDAV Installation
With the Outlook CalDAV add-in, you can perform Calendar synchronization of e-mail accounts using IMAP and POP3 protocols .
1. Click here to download the CalDAV add-in .
2. Run the downloaded Setups to install the CalDAV add-in.
3. Open the Outlook application and follow the Caldav Synchronizer > Synchronizer Profiles path from the quick access toolbar .

4. In the Options window that opens, click on the + (plus) icon.

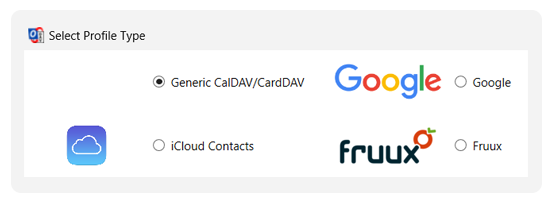
5. In the opened Select Profile Type window, select Generic CalDav/CardDav and click the OK button.

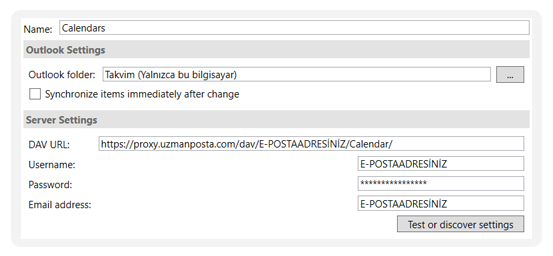
6. Fill in the sections in the window that opens as follows and click the OK button.
Name : Calendar Name
Outlook Folder : Click on the … section and select the calendar folder in your account.
DAV URL: https://proxy.uzmanposta.com/dav/E-mail/Calendar/
Username : Your Email Address
Password : Your Email Password
Email Address: Your Email Address


