Outlook CardDav Setup
With the Outlook CardDAV add-in, you can synchronize Contacts of email accounts that use IMAP and POP3 protocols .
1. Click here to download the CardDAV plugin .
2. Run the downloaded Setups and install the CalDAV plugin.
3. To perform the installation steps in the CardDav plugin, log in to Zimbra by logging in with your e-mail address and password at https://webmail.uzmanposta.com .
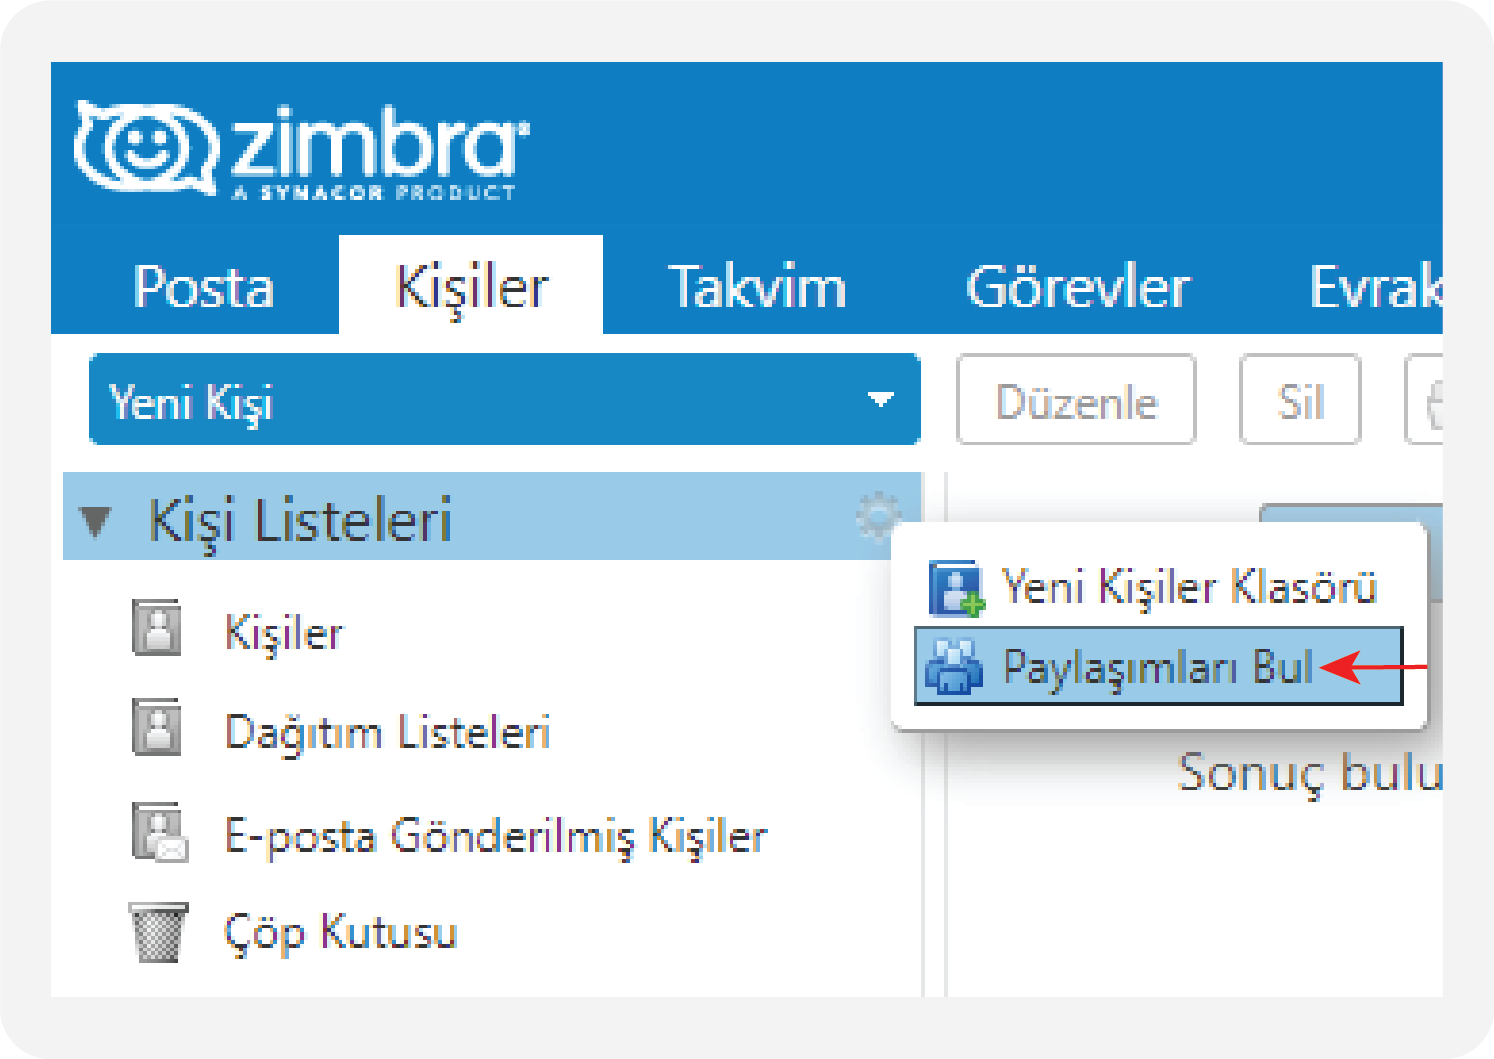
4. Click on the Settings icon in the People menu in Zimbra and click on Find Shares .
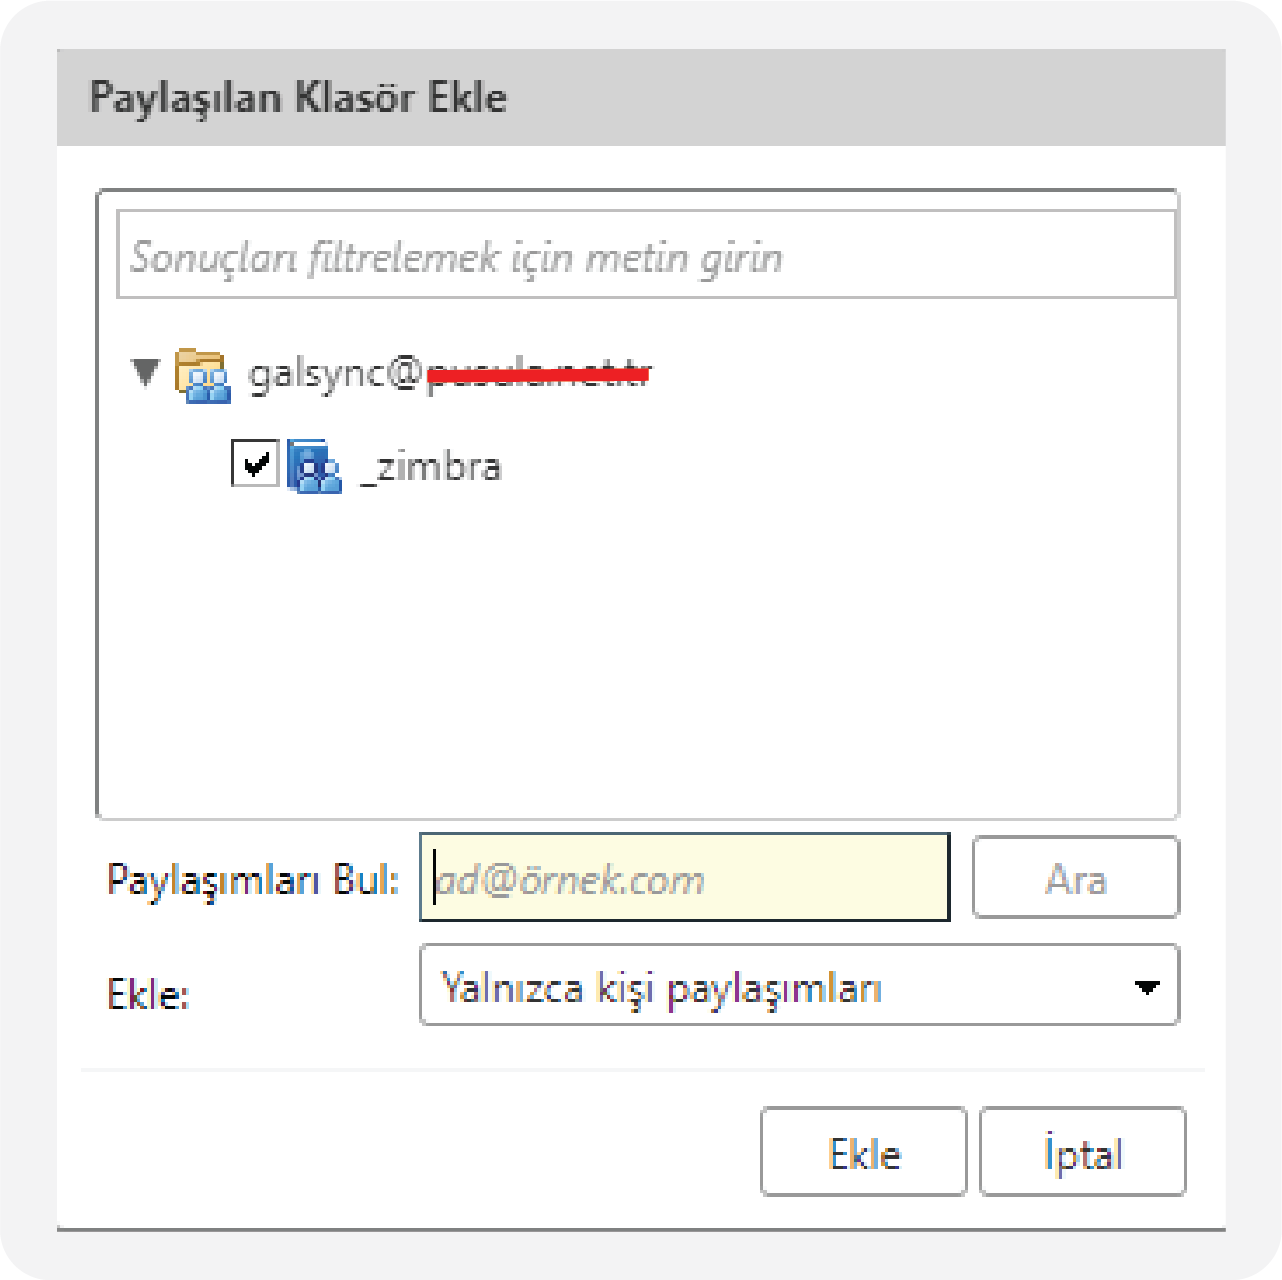
5. In the window that opens, select the share named galsync@yourcompanyname.com and click the Add button.
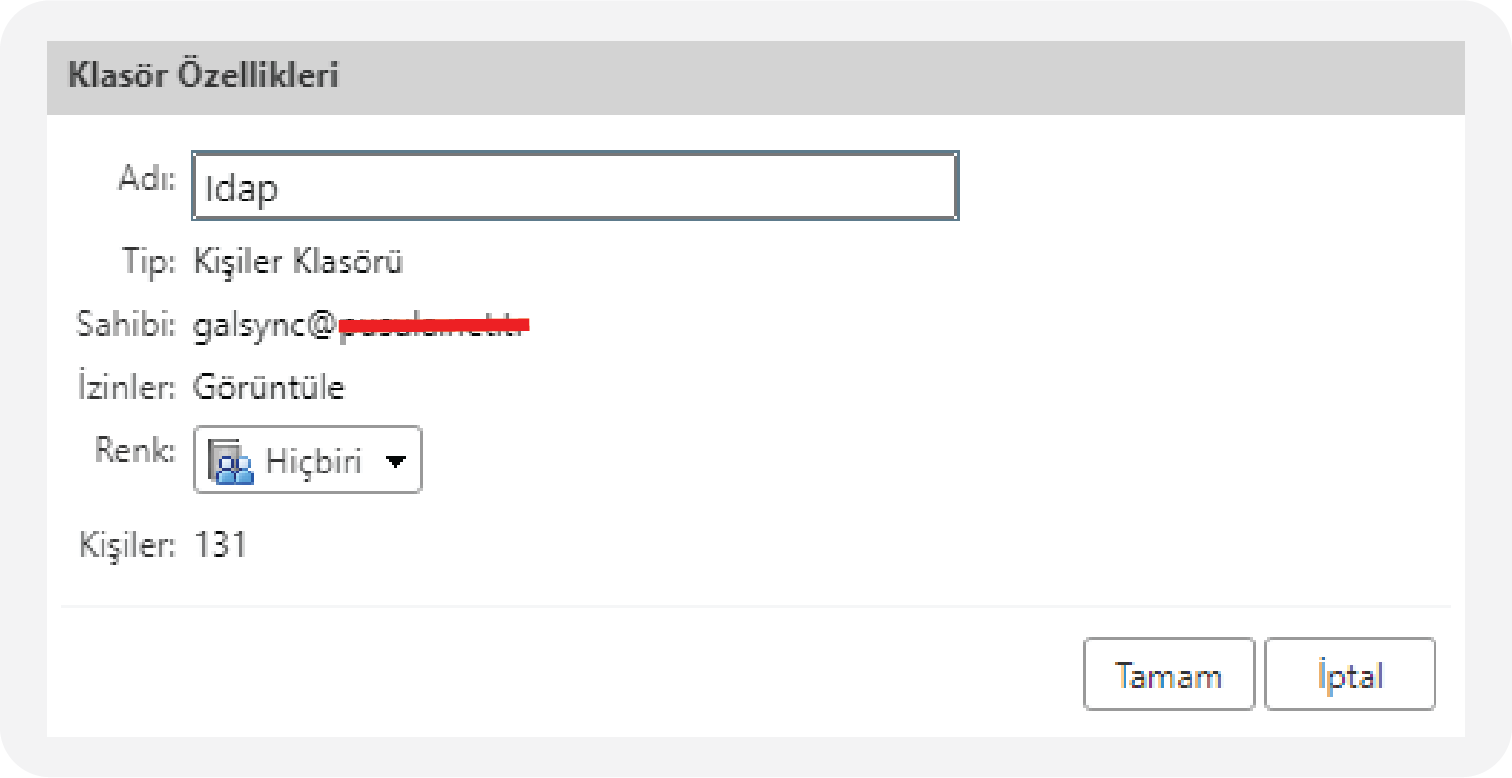
6. You can right click on the name of the shared folder and update it to ldap. You can also name it as you wish.
7. Open the Outlook application and follow the Caldav Synchronizer > Synchronizer Profiles path from the Quick Access Toolbars for Outlook CalDav installation .

8. In the Options window that opens, click on the + (plus) icon.
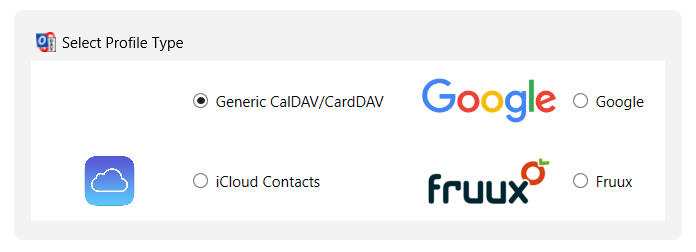
9. In the Select Profile Type window that opens , select Generic CalDav/CardDav and click on the OK button.
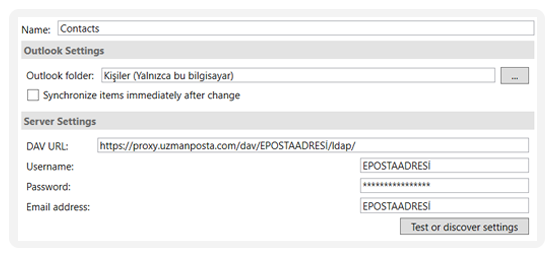
10. Fill in the sections in the window that opens as follows and click the OK button. The installation process is complete.
Name: Contacts Name
Outlook Folder: Click on the … section and select the contacts folder in your account.
DAV URL: https://proxy.uzmanposta.com/dav/E-mail/ldap
Username : Your Email Address
Password: Your Email Password
Email Address: Your Email Address
